Cascade Functionality in Vena, what is it?
The ‘Cascade’ option in the Vena add-in for Excel is one of the lesser-known features. Still, it can definitely help streamline your reporting and analysis processes. That’s why we want to zoom in on this often-overlooked functionality and show what it can do for you.
The functionality
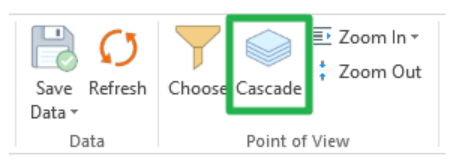
The Cascade feature is available in both Vena Desktop and Vena 365. In both versions, you'll find the Cascade icon right next to the ‘Choose’ button.
This option lets you run the same report multiple times with different selections. These different views can either be stored as separate sheets within one workbook, or as separate files in a folder on your desktop. Most users go with the first option.
Use cases
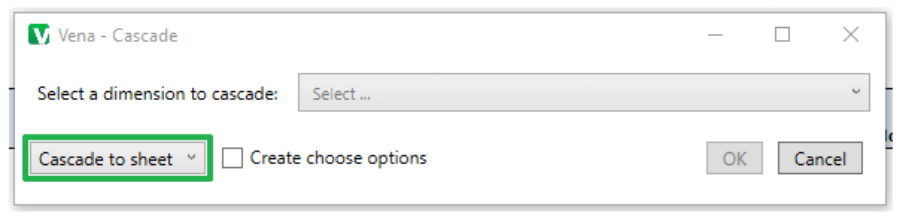
The feature comes with 3 cascading options whom all have their own use-case.
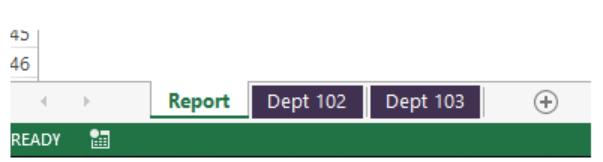
- Cascade to Sheet
This option creates new sheets within the same workbook—one for each selection. It’s useful when you want to compare different views side by side without reloading the report over and over again.
It's also helpful for publishing reports with different views to non-Vena users. We always prefer giving users direct access to Vena, as that’s the most efficient and aligns with the idea of having a single source of truth in the data model, rather than spreading offline files around. But sometimes that’s just not possible—like when you need to share a one-off version with a colleague who doesn’t normally use Vena.
- Cascade to File
This option generates separate Excel files for each selection and saves them to your desktop. It’s a good alternative when you need to run a report for multiple selections and distribute the results offline.
As with the previous option, direct access to Vena is always preferred. But if you’re dealing with a large user group who only occasionally need (detailed) insight into the underlying numbers, and licenses are limited, this can be a practical workaround.
- Cascade without mappings
This option works the same as “Cascade to Sheet” but with one key difference: it replaces all formulas with values. That makes the file less likely to break when opened by users in different regions or organizations—especially when differences in Excel settings or language can cause issues.
How-to
- Open your template in Excel and select the page options you want to view initially.
- Once the template has loaded, click the Cascade button in the Vena ribbon. (In Vena 365, it's also next to the ‘Choose’ button.)
- The Cascade menu will open. The dropdown in the lower left corner will default to Cascade to Sheet, but you can switch it to any of the other two options.

- Next, you’ll be asked to select the dimension that contains the page options you want to cascade.
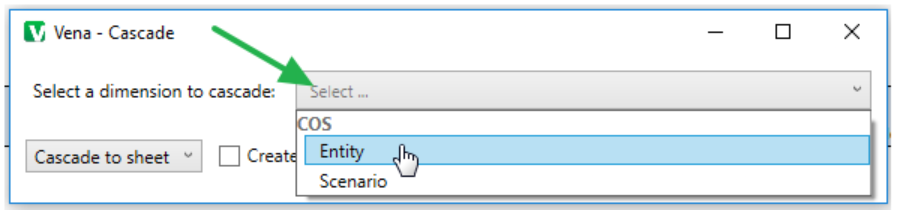
- The hierarchy browser will appear, showing the members of the selected dimensions that are configured as page options in this template.
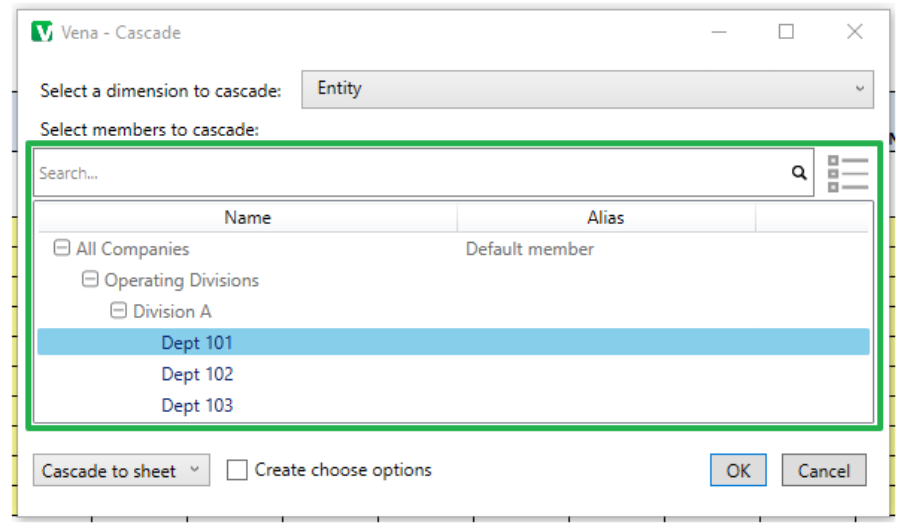
- Select the page options you want to cascade. You can select a single one or multi-select by holding Ctrl while clicking.
- When you're done, click OK. Vena will process the operation and add new sheets (or files) for each of your selected options.
Requirements
A few things to keep in mind:
- Cascade doesn’t work if your sheet contains references to other (supporting) sheets in the same workbook. You’ll need to move all required data onto one sheet for it to work properly.
- This feature is meant for reporting only. Any inputs made on cascaded sheets will not be saved back to the database.
The right tools
At Finext, it's all about the right tools for the job. Because technology can be a powerful accelerator, but it is not an end in itself. We make sure our technology seamlessly matches what is needed.
Always effective. Always results.
.webp)

Power to the financials.
No rules and procedures, but trust and common sense. Too many organizations get bogged down in thick reports and endless abbreviations. Procedures and meetings eat up time. We believe it can be done differently: smarter, more efficient and above all with more fun - without unnecessary bureaucracy.
Can I help you?
.webp)